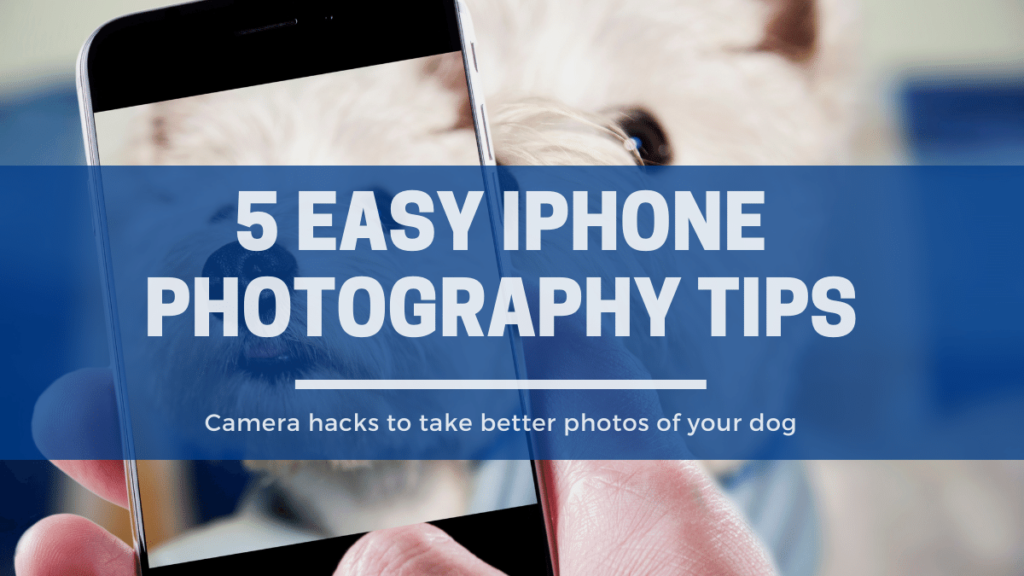
The best iPhone camera hacks to take better photos of your dog
Capturing stunning dog content is one of the most important parts of the Instagram pupfluencer journey. Instagram is a visual platform so having superior visuals is almost a mandatory requirement if you’re hoping for insta-fame success.
And, the Camera app on your iPhone is one of the best tools you can use to elevate your dog’s Instagram account.
I do have a Sony a6400 mirrorless digital camera I bust out when I’m feeling fancy, but 90% of the photos I take of Shadow and Peaches are done with my iPhone Pro Max 11. Yes, it’s an investment, but worth it as the image and video quality it produces is spectacular.
We all want better photos of our pups. Why?
Better photos of your dog = better content for your Instagram feed = better engagement from your followers + better chances your better content will get in front of new potential followers.
But it’s not always easy to get fridge-worthy canine content.
Have you caught yourself saying anything like this:
- I’m struggling to capture great photos of my pet with my iPhone camera.
- I feel like I’ve hit a plateau with the quality of my pet photos and videos.
- I don’t have the time to research and learn how to become a better pet photographer.
I got you.
I’ve compiled a list of 5 simple iPhone camera tips that you can start using today. And, y’all, they are so easy and yet will take you iPhone pet photography to the next level.
Let’s snap to it!
Table of Tips: 5 Tips on How to Use the iPhone Camera App to Take (even more) Amazing Photos of your Pet
- Wipe your lens.
- Turn on the grid function.
- Turn on HDR for outside shots.
- Use portrait mode.
- Shoot your videos in 4K.
1. Wipe your lens.
When was the last time you cleaned your iPhone camera lens (aside from right now)?
This is a super easy way to instantly improve your iPhone pictures and videos.
Our phones (and phone camera lenses) are under constant attack by dust, fingerprints and whatever else might be lurking on the surfaces, pockets or purses they rest on or in. Do yourself and your photos a favor by simply keeping your lens clean.
The best way to do this is with a microfiber cloth but your sleeve is a fast substitute.

2. Turn on the grid function.
If you want to take better iPhone photos, you first need to improve your photo composition. This refers to how you arrange your main subject (your dog) and other elements (for example, trees, a lake, toys, flowers, etc.) in the scene or frame of the shot (i.e., the rectangle display you see when you go to take a picture with your iPhone).
One of the easiest ways to do this without learning a lot of photography theory or technique is to turn on the grid function on your phone and start following the “rule of thirds.”
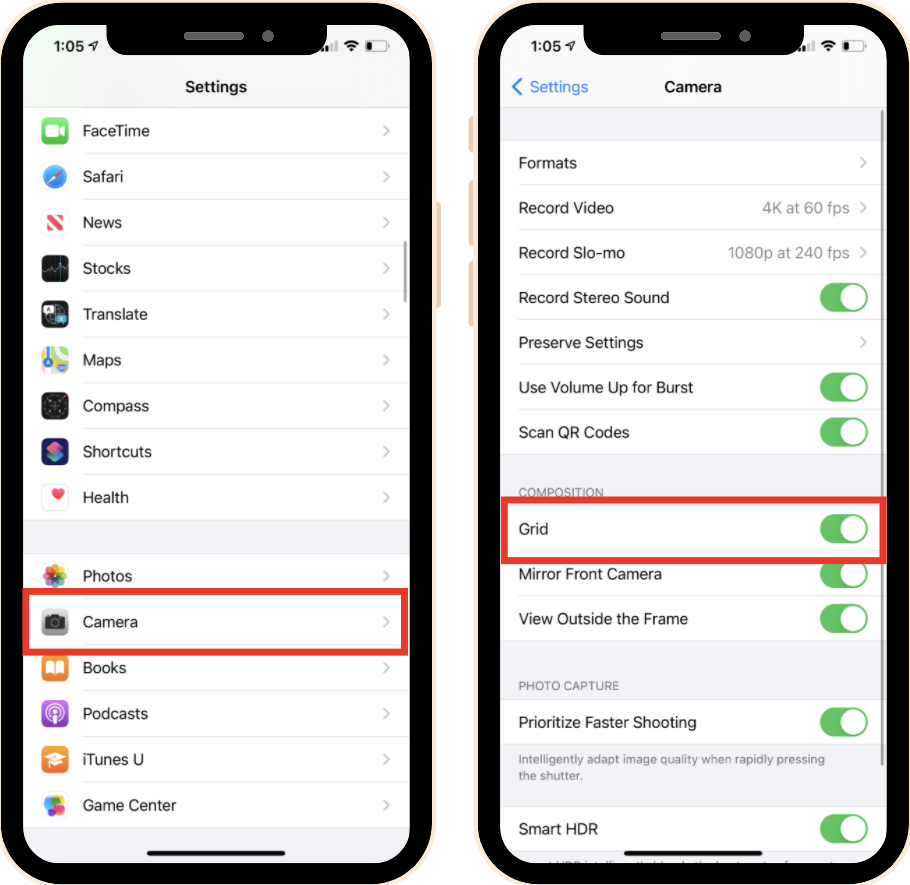
First turn the grid function on. To do this:
- Open your phone’s Settings.
- Scroll down and tap on Camera.
- Under “Composition,” turn the Grid option on or green.
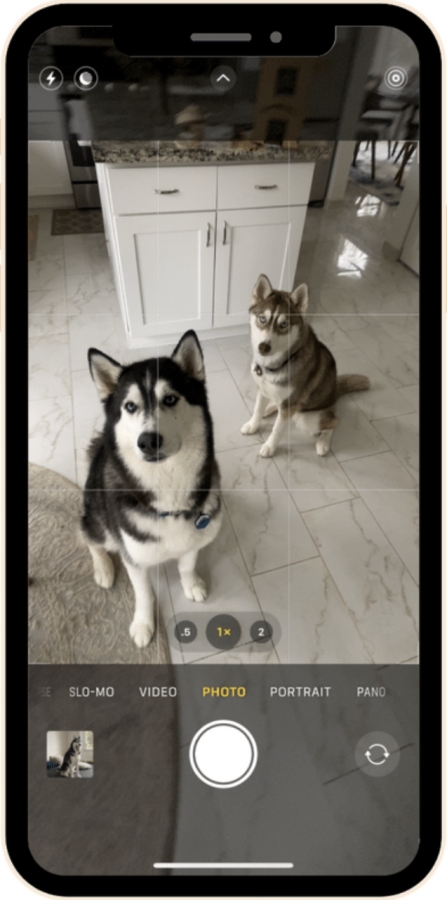
Now, when you go to take your next shot of your pet, you’ll notice a grid with 9 boxes.
To apply the “rule of thirds” to your iPhone pet photography, all you have to do is line up your main subject (your dog) at one of the four intersections where the lines cross.
3. Turn on HDR for outside shots.
If you’re taking photos of your pet outside, you will want to make sure this setting is turned on.
HDR stands for “High Dynamic Range” and essentially it’s a “smart” feature that allows your camera to use its behind-the-scenes software to take an expertly lit photo.
When you have this setting turned on, your iPhone camera will take several shots at different exposures (meaning some very bright shots, some very dark shots) and then merges all the shots into one balanced photo.
This is especially helpful when you’re shooting outside on walks or hikes when you have a backdrop that has a lot of contrasting elements like the sky, trees or a body of water. HDR works great to brighten darker areas in your photo and darken over-exposed areas (or brighter parts).
I keep this setting turned on all the time as most of our pet photos are taken outside of the house and if my camera will do all the hard exposure work for me, why wouldn’t I take advantage of that?
To turn the HDR setting on follow these steps:
- Open your phone’s Settings.
- Scroll down and tap on Camera.
- Scroll to the bottom and turn the HDR or Smart HDR option on or green.

4. Use Portrait mode.
If you have an iPhone that supports Portrait mode and you aren’t currently using it, I’m about to blow your mind.
Portrait mode is an amazing feature that makes your iPhone photos look ultra high quality.
When you shoot in Portrait mode, you will get a sharply focused subject (your dog’s beautiful face for example) and a soft, blurred background effect.
You used to need to have a DSLR (i.e., a fancy camera with lenses) or hire a professional photographer to achieve this look in your photos. Now, if you have an iPhone, you have the ability to take professional-quality photos of your pet from the palm of your hand. What a time to be alive!
Portrait mode is fantastic for taking portraits of your pets and it’s an easy swipe and tap to use.
Follow these steps to take a Portrait mode photo:
- Open your phone’s Camera app.
- Swipe from “Photo” to “Portrait”
- Frame your shot by positioning your pet’s face (or whatever subject you’re shooting) within the yellow rectangle.
- Your camera helps you even further by telling you if you’re too close or too far away.
- AND if you have an iPhone 11 lens or later, you choose which lens to shoot with. Your choices are the default 2x (telephoto, meaning up close) OR 1x (wide, meaning further away).
- Once you’re happy with the framing, tap the shutter button to capture the moment.

Once you take your fabulous photo, you can even adjust the level of blurriness if you aren’t happy with it.
To make the background either more blurry or less blurry follow these steps:
- Open the photo taken with Portrait mode.
- Tap Edit.
- Tap on the f with a circle around it in the top left of your screen.
- Drag the slider at the bottom of the screen to the left for a more blurry background or to the right for a less blurry background.
- Tap Done to save your changes.

Again, if you have Portrait mode as an option, I cannot recommend it enough. This 100% will improve your pet photography.
5. Shoot your videos in 4K.
This is another setting that you might not know about (I didn’t hear about this until recently either!) that will amaze you – and soon your followers!
4K is a type of video resolution (how realistic or clear a video appears). But not just any resolution, 4K is the highest quality video resolution option.
When you shoot a video on any camera, you have various resolution options you can choose to determine the quality of your video. Typically, you’ll see options like 720p HD, 1080p HD, or 4K.
4K captures insanely detailed, clear, and smooth videos that are four times better quality than HD. So those videos you’re seeing on your feed or on TikTok that look wildly realistic, the secret is shooting in 4K.
To turn on 4K video for the highest quality videos on Instagram, follow these steps:
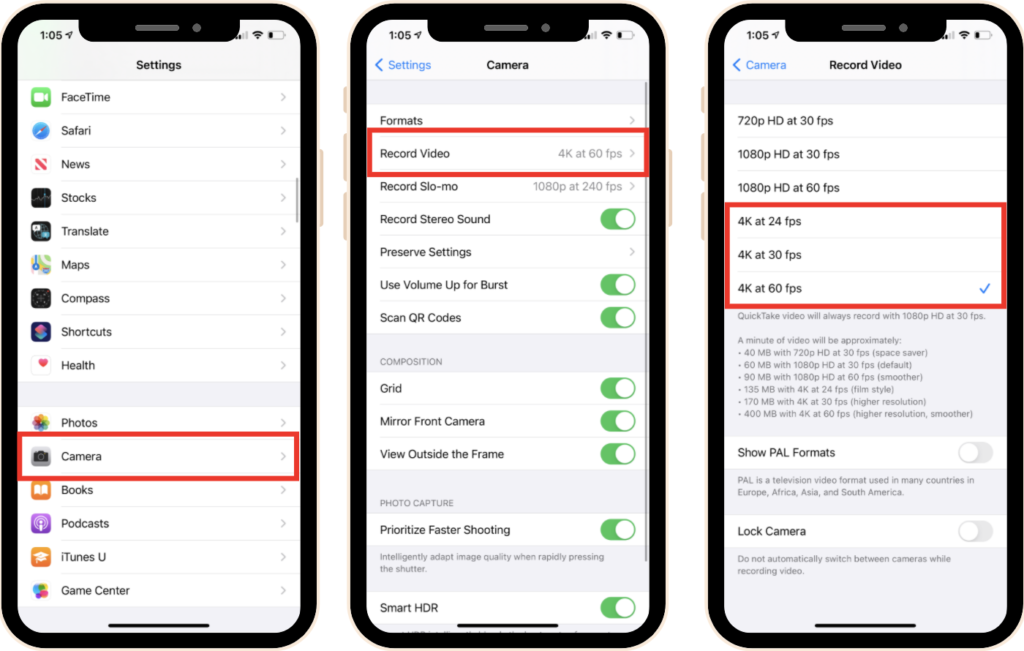
- Open your phone’s Settings.
- Scroll down and tap on Camera.
- Tap on Record Video
- Select 4K at 24 fps, 30 fps, or 60 fps. (fps stands for frames per second so the higher the fps, the smoother the video)
- Choosing 4K at 60 fps will give you the highest-quality video
The downside to shooting in 4K is phone storage. You will need to need space before shooting in 4K or you will need to up your iCloud storage plan as 4K videos, especially at 60 fps setting, take up a lot of storage space.
After you update your iPhone’s camera app settings, play around with these tips and let me know what’s working for you!